HTML/JAVA

Showing posts with label gel medium. Show all posts

Thursday, 9 July 2015

No Fear

No Fear is my submission for the Group of Eight's quarterly challenge...Street Art


The textured bricks are made with left over quilt batting. Using gel medium and paints left a beautiful textured effect.


It's my opinion on freedom of speech. Where has it gone & why can't we say what we feel without the possibility of reprisal. Words can cut so we need to be mindful but that doesn't mean we shouldn't speak our mind & be given common respect that it's our opinion & not everyone need to agree with it.
The essence of Street Art is the freedom of expression...of course this is just my opinion.

Monday, 18 November 2013

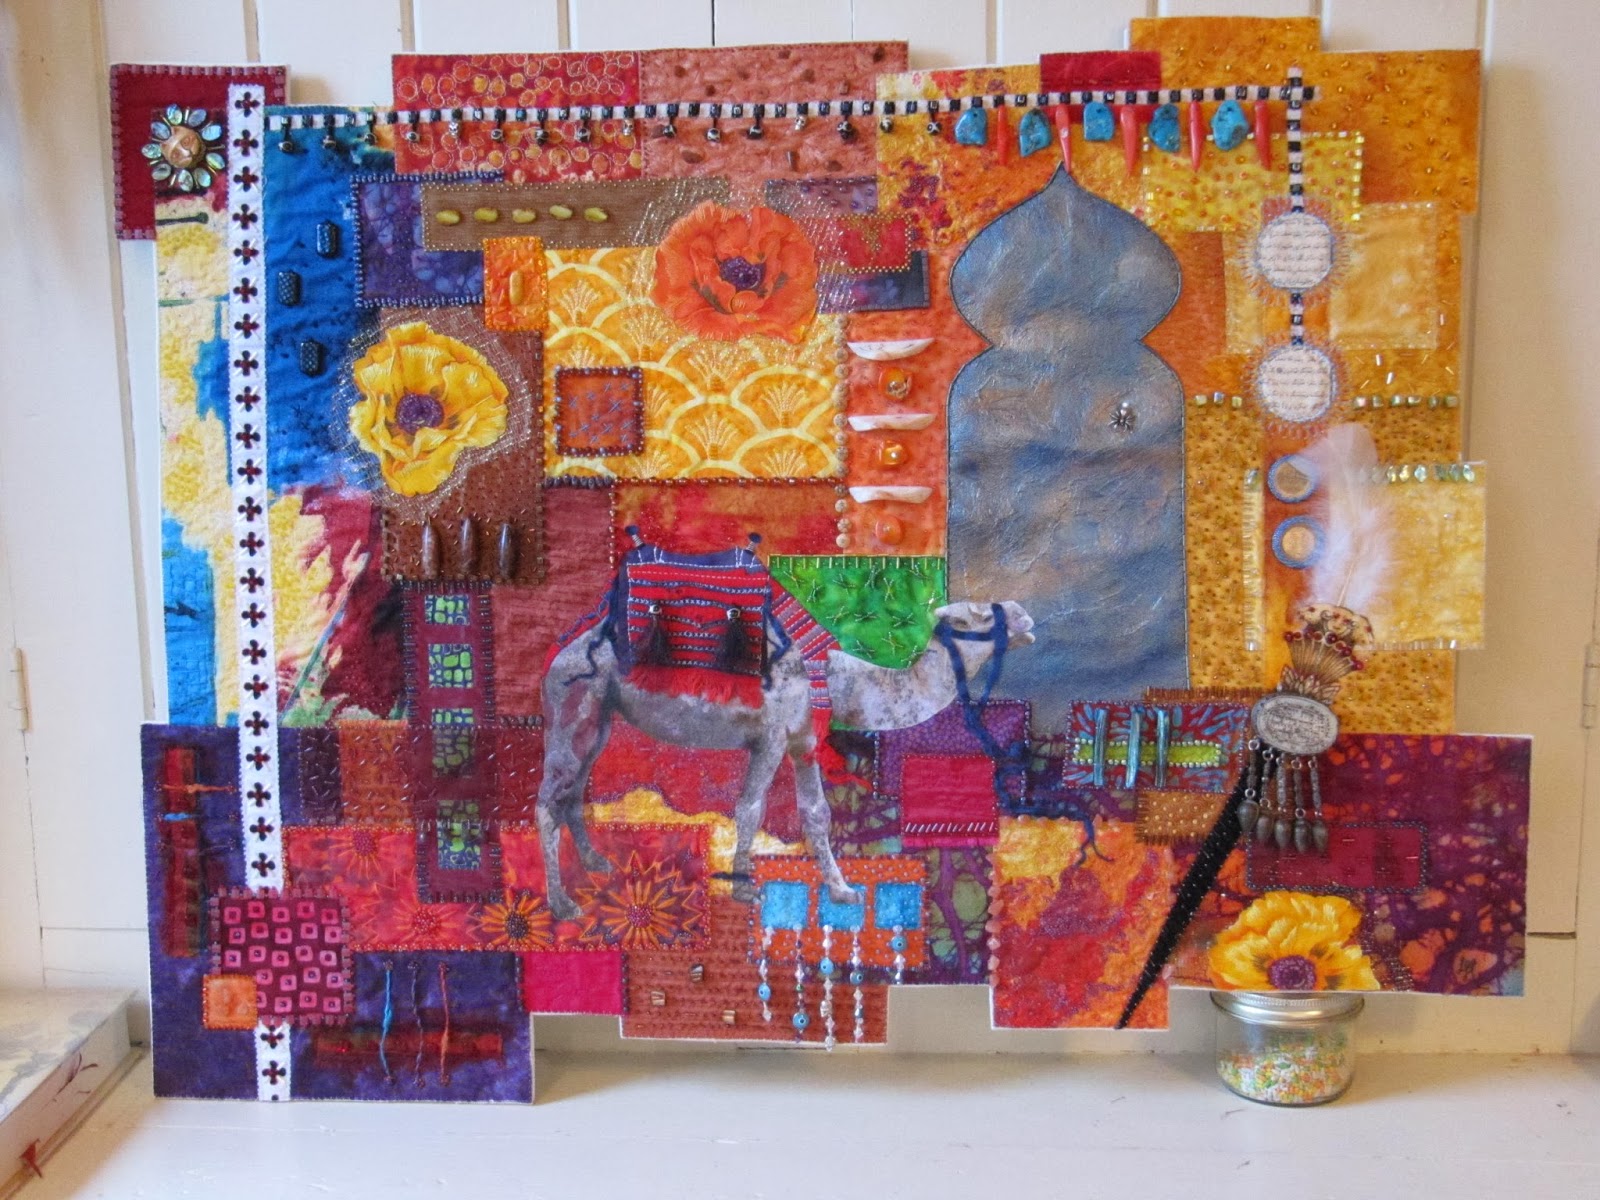
Istanbul aka Turkish Delight

This fibre art piece all started because of my trip to Istanbul. Before leaving I knew that I was going to look for some Turkish treasures to bring home for my collection but what I found went much deeper. The shop keepers stories along with Apple Tea was their way in to open your wallet. These are crafted sellers and marvelous story tellers that put my Scottish roots to shame. I enjoyed every minute of that trip & only wish that I could have seen more.


One of the shop keepers sold me beads that were made from camel teeth. I was in that store for quite some time because all I was thinking of was what I would do with them once I got home. That shop keeper sold me many beads and actually talked himself out of selling some of them. In the end we had to split the amount of camel teeth so that he could craft prayer beads...which are very popular in Istanbul.

This shows some of the detail around the camel. The Evil Eye is also very popular in Turkey. It's actually called a Nazar, which is an eye shaped amulet. As many already know, it was created to protect against the Evil Eye. It's believed to contain certain magical properties which would provide good luck or offer protection from evil or harm. I now have a Nazar in my studio window to bring me good luck & I've included them in  this piece.


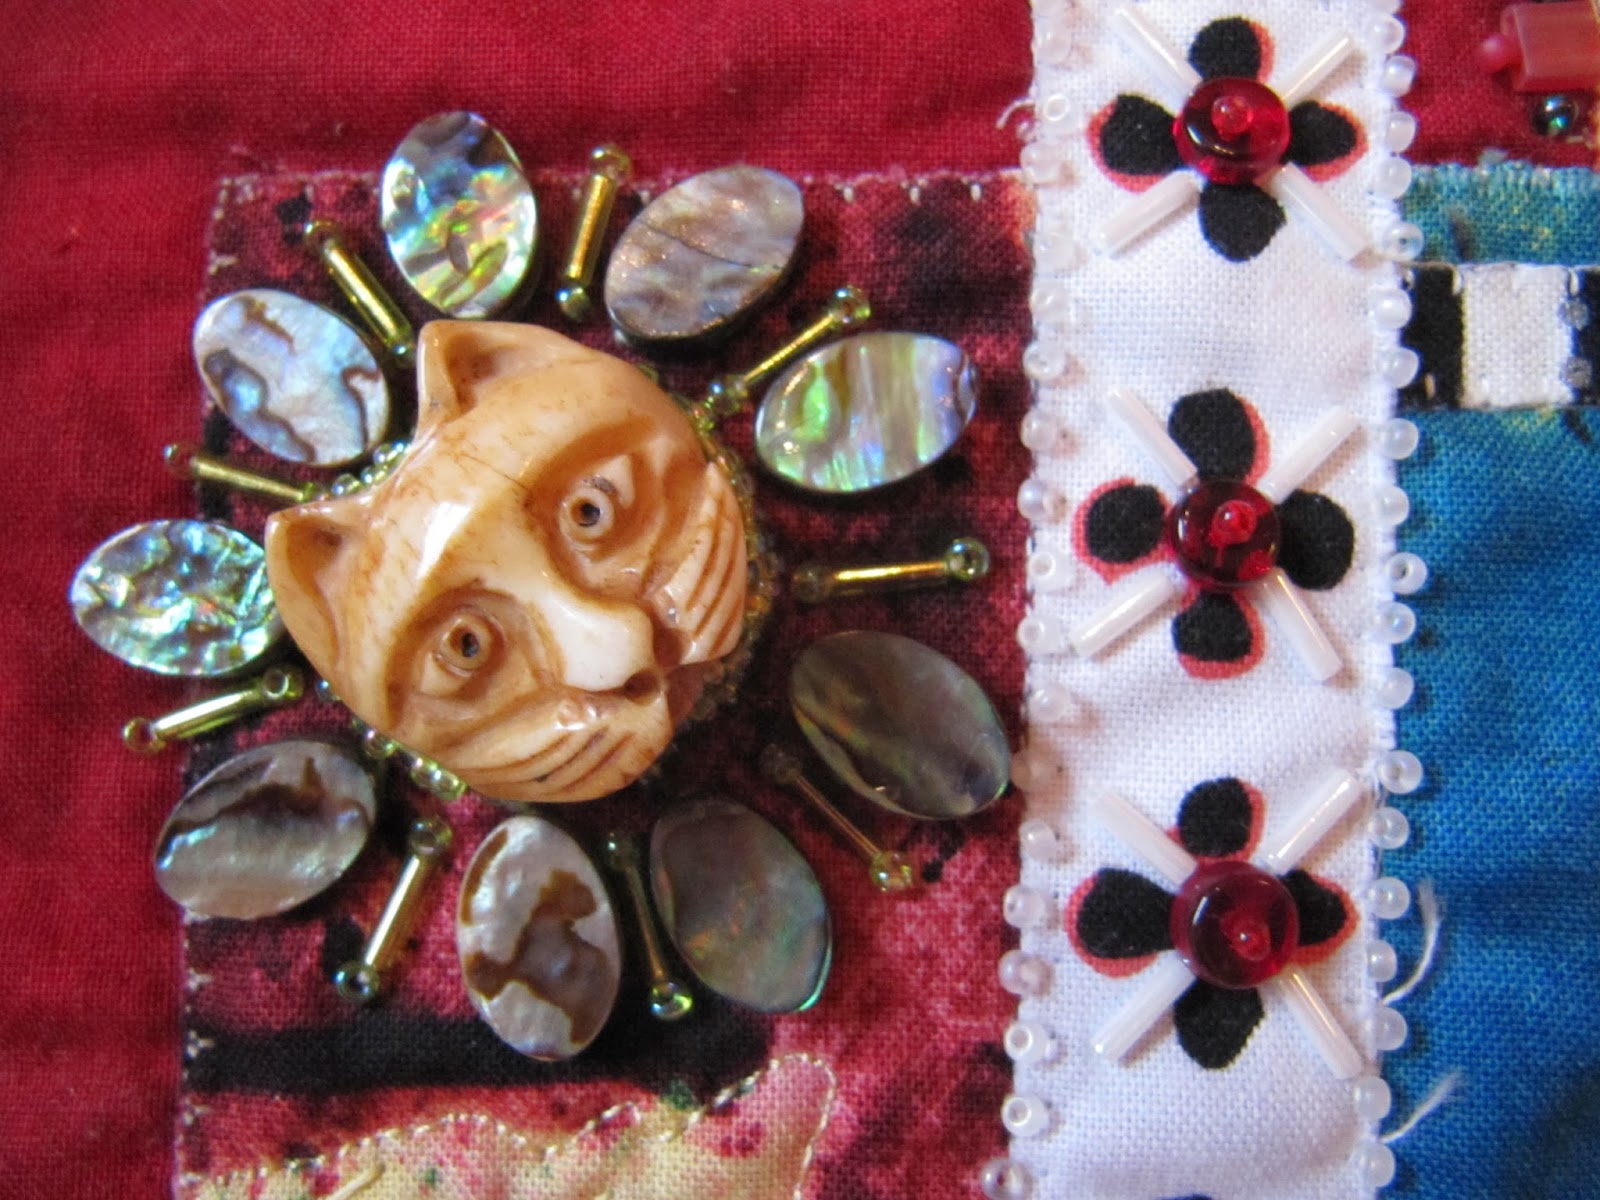
 Istanbul is also know as The City of Cats. 
Cats are absolutely everywhere and they're very well looked after by everyone. They believe cats are better than rats. 
I would sit happily for hours people watching with a cat on my lap.


The spider in the cave is representative of a story told to me by a local carpet & kilm seller. As the story is told...there were men from Mecca that were out to harm the prophet Muhammad. So Muhammad took shelter in the cave of Thawr. While inside the cave a spider spun a web across the entrance. When the men from Mecca arrived at the cave they believed no one had entered because the spiders web had not been broken. Many traditional carpets have the cave as the main subject. My cave is made with an art cloth technique shown previously in earlier blog posts.

This picture shows my representation of a Sultan Turban Pin that was shown in one of the museums. My actual pictures didn't come out as it was behind glass & I couldn't get a good angle. So I just made my own.


This is just a detail picture of one of the a poppies.


This piece took me a very long time from beginning to end and I'm very glad that's done. Now it's time to clean the studio and hopefully my next project will give me a bead break...but who knows.

Monday, 23 September 2013

Shopping for MORE...

This past week was a beading break. I was in the studio & pricking my fingers endlessly until the air was blue...that's enough...time to clean up & just stop pricking my damn finger. I read articles from magazines that had been sitting in the book pile and I just enjoyed my time researching new products on-line. When I go through books & magazines I mark pages with tabs for future reference. I make notes in a little book I carry with me & when I have some time I go through the tabs & do in-depth research into the products & how they're used.Then it's all about shopping. Where can I buy some of these products... So that's what I've been doing...Shopping for future art paraphernalia. Hopefully I'll be able to show something I've done using TerraSkin paper or my new Ampersand Claybords...not today but hopefully soon.


Once again I used canvas that had been sealed with gesso. I then added molding paste using a stencil for texture. Painted with metallic paint & then I added another used, painted & melted dryer sheet. I really am addicted to dryer sheets and as much as I use them...the pile just never seems to go down. Every week I have another batch to add to the stack.


Monday, 16 September 2013

MIxed Media Journal Cover 2


 Here's another journal cover that I made using canvas. It started as plain canvas that I painted with gesso, copper metallic paint & then I added the design. The design is made from a used dryer sheet that was painted with alcohol inks & then I heat gunned it to melt parts away in order for the base colour to show through.


I attached the design using a gloss gel medium. It turned out to be a very sturdy journal cover.

Monday, 9 September 2013

Mixed Media Journal Cover

This is a journal cover that's in the works. It takes quite a lot of time to dry from the raw canvas stage. As soon as it's cured, I'll stitch the bottom & insert the journal. I'm leaving the edges frayed because I really like the grunge look.


Sunday, 1 April 2012

Sheet Protector ATC

Today I felt like playing with heat.There is a technique in the Creative Embellishment book that I believe I've mentioned before on my blog. I just love this book. Apparently you can sandwich fabrics between a sheet protector and heat it with an iron for a great look. Well I was very unsuccessful with the iron. My iron and I just don't get along. So I left it and started melting some painted Tyvek for beads. Then I thought that maybe I could try the sheet protector technique again using my heat gun. So I grabbed a saved paper napkin from my basket of odds and sods, layered it between a photograph protector and heated it. I didn't want it to be square so I kept melting until the edges got really rough. I then added Citrine Lumiere to the rough edges. I didn't mind the look so I figured my little sample could be my next ATC. For the background I started with a Bristol ATC card. I had some saved paper towel with left over inks on it that seemed to match the flower, so I just started layering paper towel with watered down white glue until I thought that it was enough. I think it was three in total. I'm very impatient so I rolled my paint brush over the paper toweled ATC to take out the extra glue...put it between my teflon sheet and that's when my iron came in handy. I ironed until it was dry. I then added gel gloss medium to give it some shine....dried it with my heat gun and added Citrine Lumiere to the edges with my finger. I think I'll play a little more with this technique. I really want to achieve the look that was presented in the book.


Sunday, 27 November 2011

Surface Design Beginning

This weekend I had to finish my Artist Trading Card sized, surface design so that it can move on to the next person in the group. I seem to be having difficulty finding the time to work on my projects now that I'm back at work. I no longer have the luxury of creating when I feel like creating. So now it's down to a time crunch thing and I find that I feel as though I'm working because of the deadline rather than feeling inspired to create. I usually work on a project until I hit a roadblock and then I move on to something else while my mind mulls over the next step. I spent hours in the studio but a lot of that time was uninspired so I'm not completely happy with the turnout. But it must move on...so here's the picture.

Saturday, 1 October 2011

tyvek sample

I'm in love with melting tyvek. Recently I borrowed a book from a friend called 'Surfaces for Stitch' and in it there is a section on tyvek. It re-inspired me to head back to the studio and melt more tyvek. In this sample I used gel medium to adhere a used, painted and melted dryer sheet to a FedEx tyvek envelope. Once dry, I then placed it between parchment paper and heated it with an iron. I just loved the texture, however, some of the FedEx print was showing through the holes in the dryer sheet. So then I had to add more paint in order to cover it up. I used my inks and dropped randomly around the piece and let it run. I also rubbed ink over the surface until I got the effect I was looking for. I have no idea what I'm going to do with the sample but I had fun and I'll add it to my basket of goodies.