HTML/JAVA

Showing posts with label beading. Show all posts

Monday, 18 November 2013

Istanbul aka Turkish Delight

This fibre art piece all started because of my trip to Istanbul. Before leaving I knew that I was going to look for some Turkish treasures to bring home for my collection but what I found went much deeper. The shop keepers stories along with Apple Tea was their way in to open your wallet. These are crafted sellers and marvelous story tellers that put my Scottish roots to shame. I enjoyed every minute of that trip & only wish that I could have seen more.


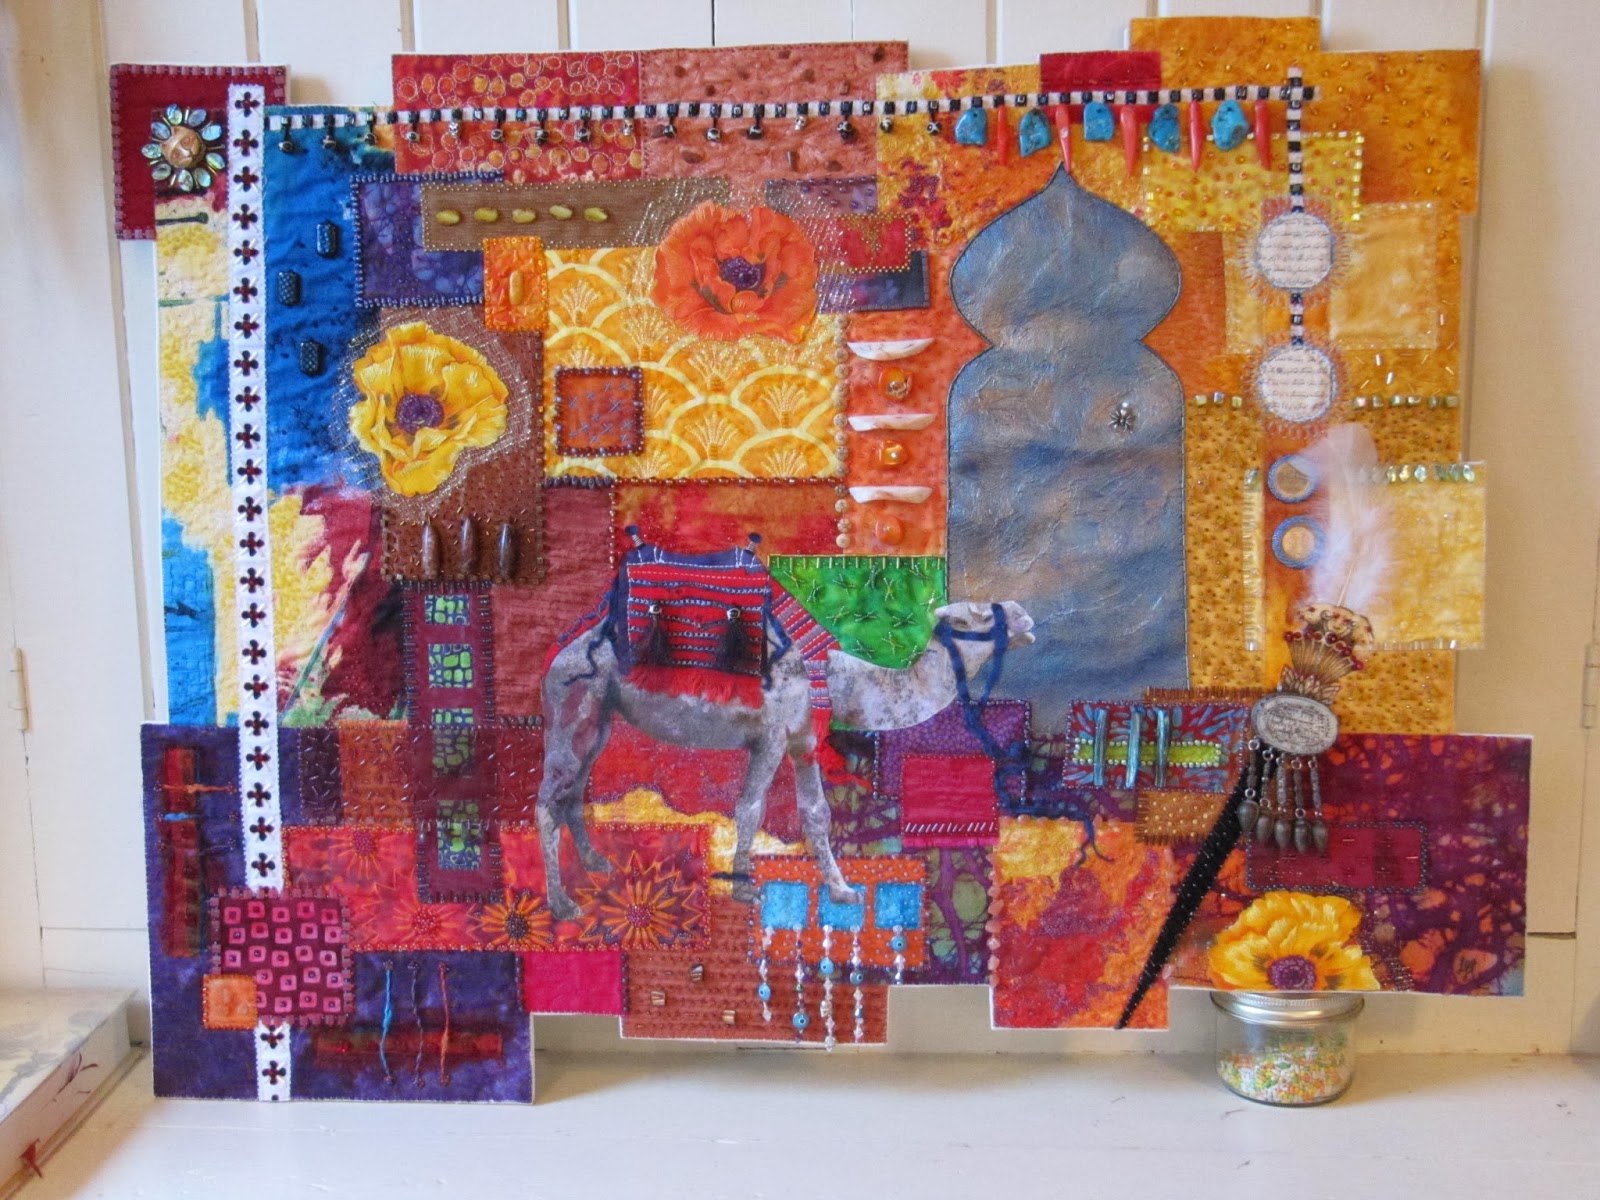
One of the shop keepers sold me beads that were made from camel teeth. I was in that store for quite some time because all I was thinking of was what I would do with them once I got home. That shop keeper sold me many beads and actually talked himself out of selling some of them. In the end we had to split the amount of camel teeth so that he could craft prayer beads...which are very popular in Istanbul.

This shows some of the detail around the camel. The Evil Eye is also very popular in Turkey. It's actually called a Nazar, which is an eye shaped amulet. As many already know, it was created to protect against the Evil Eye. It's believed to contain certain magical properties which would provide good luck or offer protection from evil or harm. I now have a Nazar in my studio window to bring me good luck & I've included them in  this piece.


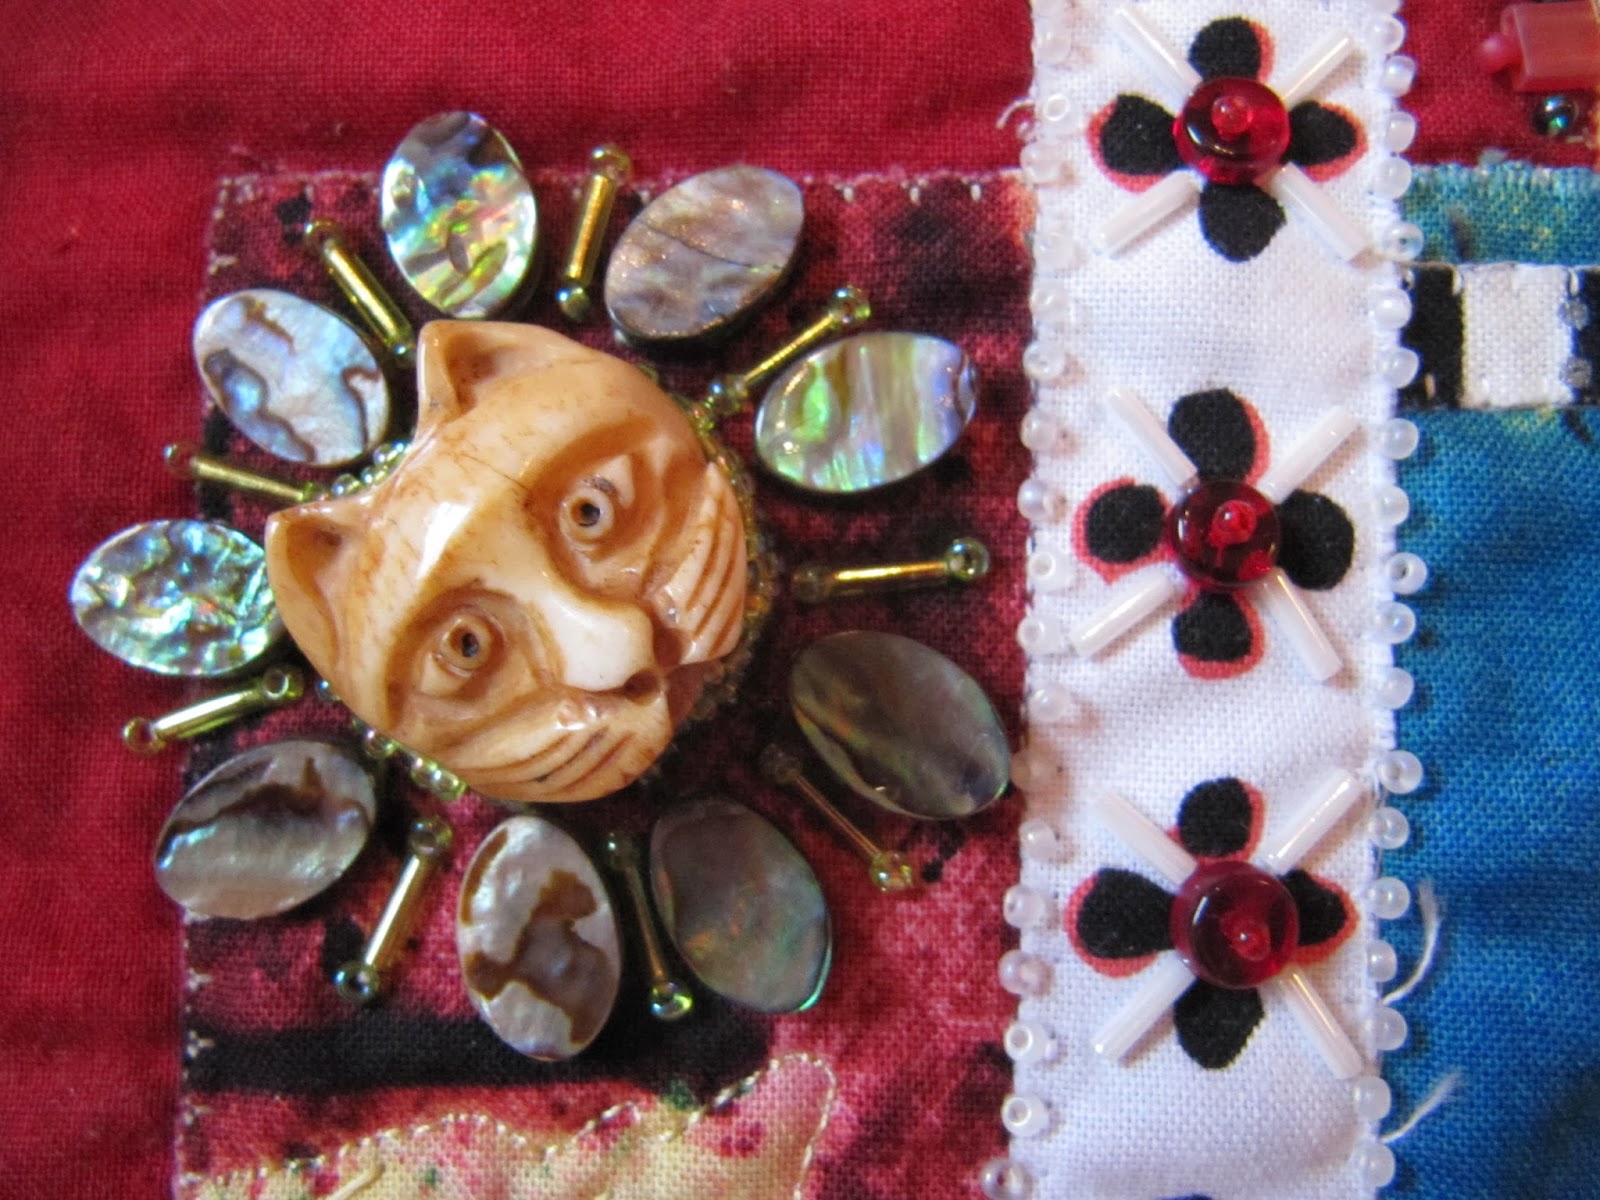
 Istanbul is also know as The City of Cats. 
Cats are absolutely everywhere and they're very well looked after by everyone. They believe cats are better than rats. 
I would sit happily for hours people watching with a cat on my lap.


The spider in the cave is representative of a story told to me by a local carpet & kilm seller. As the story is told...there were men from Mecca that were out to harm the prophet Muhammad. So Muhammad took shelter in the cave of Thawr. While inside the cave a spider spun a web across the entrance. When the men from Mecca arrived at the cave they believed no one had entered because the spiders web had not been broken. Many traditional carpets have the cave as the main subject. My cave is made with an art cloth technique shown previously in earlier blog posts.

This picture shows my representation of a Sultan Turban Pin that was shown in one of the museums. My actual pictures didn't come out as it was behind glass & I couldn't get a good angle. So I just made my own.


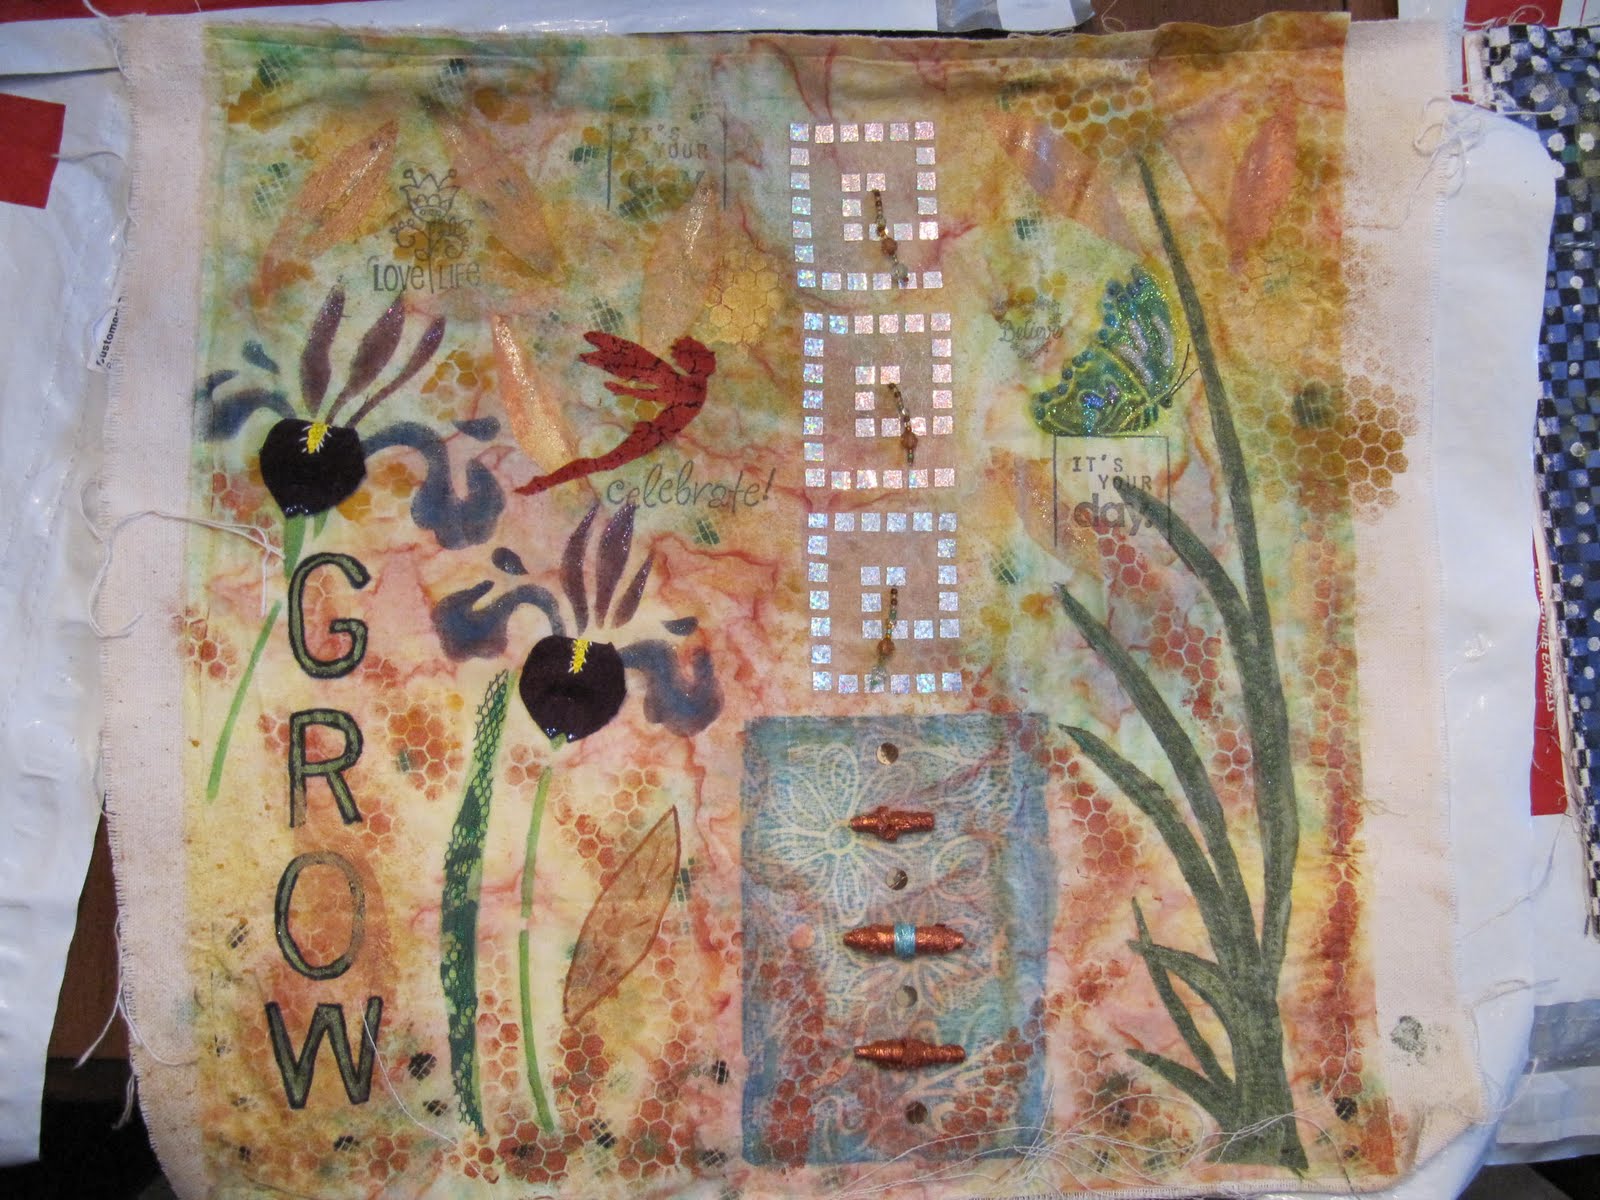
This is just a detail picture of one of the a poppies.


This piece took me a very long time from beginning to end and I'm very glad that's done. Now it's time to clean the studio and hopefully my next project will give me a bead break...but who knows.

Monday, 11 November 2013

Beaded Coin


My Turkish piece is almost complete. I have just a little more embroidery to do tonight & then I have to mount it. So I'm very close. The picture is of a coin that I attached by surrounding it with beads. It's the first time I've ever done it & I will admit to bead enthusiasts that I have no idea if this was done "correctly". The first time the coin popped out...so I redid it and this one seems to want to stay put.

Monday, 12 August 2013

Beading...beading...BEADING

Here's more eye candy from my Turkish piece. I've been beading most nights and quite a few hours on the weekends & I'm only getting close to half way.


I have deadlines on other projects and I'm having trouble getting to them. Once the beading begins there is a mountain of beads & threads on my work surface. Having to clear everything away in order to get my mind set on something else is very difficult for me. This is all I think about in the studio...at least for the time being.

Monday, 22 July 2013

The Beading Continues

Here's another progress shot of the beading process. The dangley bits took me quite a lot of time as I've never done them before. I wonder if there's a faster way that I could have found on Google.


Monday, 15 July 2013

Extreme Beading

My Turkish camel piece is still being worked on. As you can see the beading has begun.  This piece has been in stages for nine months now. I had a full Saturday in my studio when I had set everything up to start quilting it. Well...you know what they say to best laid plans...it didn't work out very well. I've elaborated below if you're interested.


This project just didn't want to be machined. I did something that I never do. I stitched & ripped out all day long. Every time I started I would end up ripping it out. This was my whole day in the studio. Then I just decided that this piece just didn't want to be machine quilted. So now it's all up to hand embroidery & beading. Oh my goodness it'll be many more months before it's completed.
I asked my husband to source out an audio book for me so that I could be in my studio quietly so as to not disturb my son. This is also something that never happens. I love music in the studio...something that I don't think about...just work through. The next Saturday in the studio was very rewarding. I can't sit or stand for great lengths so I break it up and do many things during the day. I was very happy with the beading and Sunday morning I thought that I would quietly slip back to the studio for another day of audio & hand work. To my surprise, my audio book was complete within minutes. I actually burned through 10 hours of audio on Saturday without having any clue as to the amount of time spent. I was literally shocked. I have never counted time in the studio so I was completely clueless. The next shock...was how little seems to be done. I still have over 3/4 of the project to go through. The picture doesn't show the whole of the beaded area...just a taster.

Thursday, 2 May 2013

Monochromatic Challenge


The last challenge submission for the GOE Group was Monochromatic. I had no idea what I wanted to do and all I was thinking about was spring and purchasing seeds for our property. I was also consumed with bees...and learning all I could for our new apiary. All I could come up with was a flower...monochromatic was devastatingly hard for someone who loves colour. It was extremely hard to take a picture of the finished piece because it's 3D and the beads reflect from every angle.
I have details of the progress but it's way too many pictures.


I started out using flexi firm purchased from my local Fabricland.  Then I stitched stainless steel 20 gauge wire to the underside of all the petals. I gesso'd both sides, added cheese cloth & painted it with a gel matte medium & jacquard textile paint. Then I spread some molding paste over everything in a very random...scratchy motion. These are the brighter portions in the pictures because after you apply molding paste, those parts don't absorb the paint in the same way. After the molding paste was dry, I then applied paint & hand stitched for some added texture. Then I decided to add some encaustic wax over the whole top side of the petals. Once I did this the hand stitching actually changed colour & the embroidery was less visible. I wasn't really expecting that but I was reading a book called Hot Textiles...and that's what she did and I loved the effect. My pictures don't get as close as her professional pictures in the book so you really can't get a feel for that.


All the petals were stitched together and then nailed to a back board. I then worked on the center beading, adding sequins and stuffing in a donut shape so that the very center is actually recessed a bit for an added 3D element.


 Posting has become a very difficult task lately. Not only does one have to find time...but one has to find time where the computer is not in use. In my house this is becoming quite the task. Is it too hard to ask for a dedicated computer that has some speed to it. Is this growing world of computers one would assume that we could have fast service but I'm finding that it's getting slower & slower...and this "cloud" is bogging everything down. lol. I've been working on this posting in my spare minutes for days....crazy...In my next life, I will have a computer that works fast and I'll have all kinds of time for my studio.

If you want to see more pictures of the process...

Sunday, 21 October 2012

Peace Out

This peace has been worked on over a period of many months. I would do a little bit and then leave it to manifest in my brain until the next step would come. As usual the steps would come to me slowly through my dreams. Then I would get the idea and rush to the studio to do that step before it got lost in the abyss of daily life. Over the months I had it on the corner of my table, as it patiently waited...putting beads on it...laying similar colours on it until something would click. Now I'm still waiting for a hanging idea. I've played with wood and antler but everything just seems a little too heavy. So I'll have to wait until the perfect item arrives in my studio. But for now that's all it's waiting for.
I began with a piece of cotton batting and started layering wool rovings to it.

As you can see, it's nothing at this point but a dogs breakfast.

Then I took some yarn that's in my stash and started layering it.

I had selected yarns that I though would look good together and I would add them by twisting and bunching them together so that I would get a very raised nobly effect. At this point, I'm still not sure this is working.


This is the stage that I stopped in order to get a true feeling for it. I knew that it needed more but I just had to let it manifest before moving on.

Unfortunately I didn't continue to take pictures of the next stages. I decided that I would add some hand stitched elements to it but because of the nobly effect, anything too small would have gotten lost in the yarn.


This is a more detail shot of the hand stitching. After the hand stitching step, once again the piece was laid to rest until the next step arrived. During that time I was reading a book called "Hot Textiles" and decided that I needed to have some Xpandaprint. When the Xpandaprint came in it sat on the shelf waiting for me to be brave enough to try it. Then one night the next step came & I was in the studio. I got the felting machine back out and felted some areas more deeply in order to have a place to add the Xpandaprint. Xpandaprint is a type of puff medium. When you heat it, it puffs up. So I heated the areas, then painted over it. Then, I added Dorlands wax medium on top of the painted medium, added beads and suddenly "Peace Out" was born.

This is just a another detailed shot.
This piece is called "Peace Out" because of a very good friend of mine. Most families go through very tough times in their lives with their children...some are worse than others...but it's a time when all we pray for is peace. One time, this friend, signed off her email to me as "peace out" and I thought it was just so funny...so raw...and this piece just seemed to name itself as it developed. Some symbols just seem to evoke a sense of peace and for me it's Buddha...don't know why...can't explain it...I have one in my garden as a meditation, reflective spot and I also have one in my home.

Sunday, 15 April 2012

Poppy Cock

Poppy Cock has now been completely beaded. I have posted previously but I didn't have the painting done and the beading had not started.
Poppy Cock

Australian Opal's and the Wish Bone


Saturday, 24 March 2012

Surface Design Challenge Submission

This is one of the Surface Design Challenges that I received and completed a few weeks ago. The theme is flowers and everyone is to submit a post card sized section for the project. I hung the background and pinned all the submissions on to it, in order to give me a feel for what colour I wanted and where I wanted to place my submission. For some reason the dandelion came to mind and I thought of flowers at their final stage. I have not done any free motion embroidery for some time and thought that the time was now. So I drew a basic dandelion fluff pattern on tissue....sandwiched it between two layers of water soluble stabilizer, hooped it in a narrow embroidery hoop and off I went. I hope you actually are reading this because I've learned something doing this...NEVER...NEVER...use tissue. It was complete murder getting it all out. Silly me...I could have just drew it on the water soluble stabilizer and been done. Lesson well learned. I had never used water soluble stabilizer before...but of course I had it in the studio for years.
I drew the head of the dandelion with an air erase pen on fabric and painted it with Lumeire paints.
The next step was the fluff to be overlaid on top of the painted stem. I used Sulky silver embroidery thread in the top and bobbin of the machine so that it had a little glitz. I really love sparkle. I then added silver glass beads, which does not show up in this picture. In hand you can see the added depth and of course...sparkle.
I painted the leaves freestyle...not having a clue really but what the heck...caution was already out the window and the tunes were cranked...I was at home in my element and loving it.
The final step was adding the tiny seeds floating away. It's called the end and is placed as the last block. I had fun doing this one and felt so inspired just playing around with some new techniques.
Here's the background with all the submissions up till mine. Four more to go.

Sunday, 6 November 2011

Surface Design Reveal

Last weekend I met up with the Surface Design Tribe and was completely overwhelmed by the ideas for the next design challenge. After we decided what our next round robin project was going to be we had a show and share of what the members had done since our previous meeting. The eye candy just had me hovering above ground...no rest for the wicked right. It was so exciting. Our group has now expanded to 12 members so the next installment from this group will have 12 blocks rather than 10. The fun has begun again, but for now, here's the pictures of the reveal.


Saturday, 1 October 2011

Cock of the Rock

Cock of the Rock was my next Group of Eight challenge. One of the members brought rocks back from Arizona and the challenge was to use at least 5 of the rocks and 'Rock' had to be in the title of the piece. I knew that the next challenge was going to be a chicken of some sort. I'm in love with chickens and wanted the next challenge to incorporate something that I really wanted for my own. So I had no idea what the challenge was going to be but I did know that it was going to have a chicken in it. So when the challenge was issued I started my background and knew that I was going to do the rooster on a rock wall. When the background was complete I thought that it was too dark and made a second background. I posted both of the backgrounds on my design wall and decided that I would wait for the rooster to develop before I chose which one I would use. I actually went with the first one that I made originally....isn't that what we're always told...the first one is always the best.